TensorFlow Object Detection in Ruby
The ONNX Runtime gem makes it easy to run TensorFlow models in Ruby. This short tutorial will show you how. It’s based on this tutorial from tf2onnx.
We’ll use SSD Mobilenet, which can detect multiple objects in an image.
First, download the pretrained model from the official TensorFlow Models project and this awesome shot of polar bears.
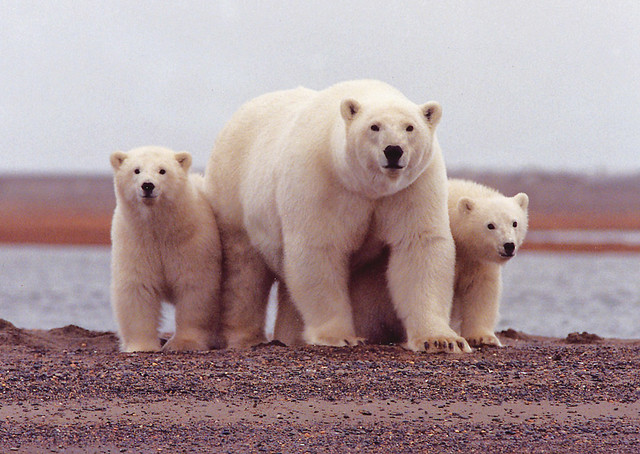
Photo from the U.S. Fish and Wildlife Service
Install tf2onnx
pip install tf2onnx
And convert the model to ONNX
python -m tf2onnx.convert --opset 10 \
  --saved-model ssd_mobilenet_v1_coco_2018_01_28/saved_model \
  --output model.onnx
Next, install the ONNX Runtime and MiniMagick gems
gem "onnxruntime"
gem "mini_magick"
Load the image
img = MiniMagick::Image.open("bears.jpg")
pixels = img.get_pixels
And the model
model = OnnxRuntime::Model.new("model.onnx")
Check the model inputs
p model.inputs
The shape is [-1, -1, -1, 3]. -1 indicates any size. pixels has the shape [img.height, img.width, 3]. The model is designed to process multiple images at once, which is where the final dimension comes from.
Let’s run the model:
result = model.predict({"inputs" => [pixels]})
The model gives us a number of different outputs, like the number of detections, labels, scores, and boxes. Let’s print the results:
p result["num_detections"]
# [3.0]
p result["detection_classes"]
# [[23.0, 23.0, 88.0, 1.0, ...]]
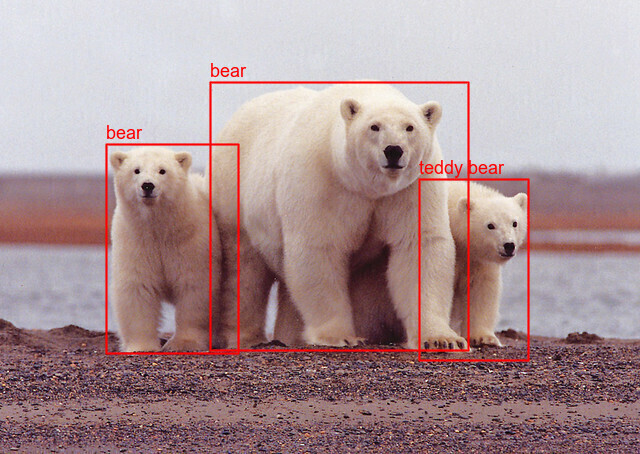
We can see there were three detections, and if we look at the first three elements in the detection classes array, they are the numbers 23, 23, and 88. These correspond to COCO labels. We can look these up and see that 23 is bear and 88 is teddy bear. Mostly right!
With a bit more code, we can apply boxes and labels to the image.
coco_labels = {
  23 => "bear",
  88 => "teddy bear"
}

def draw_box(img, label, box)
  width, height = img.dimensions

  # calculate box
  thickness = 2
  top = (box[0] * height).round - thickness
  left = (box[1] * width).round - thickness
  bottom = (box[2] * height).round + thickness
  right = (box[3] * width).round + thickness

  # draw box
  img.combine_options do |c|
    c.draw "rectangle #{left},#{top} #{right},#{bottom}"
    c.fill "none"
    c.stroke "red"
    c.strokewidth thickness
  end

  # draw text
  img.combine_options do |c|
    c.draw "text #{left},#{top - 5} \"#{label}\""
    c.fill "red"
    c.pointsize 18
  end
end

result["num_detections"].each_with_index do |n, idx|
  n.to_i.times do |i|
    label = result["detection_classes"][idx][i].to_i
    label = coco_labels[label] || label
    box = result["detection_boxes"][idx][i]
    draw_box(img, label, box)
  end
end

# save image
img.write("labeled.jpg")
And the result:
Here’s the complete code. Now go out and try it with your own images!
Updates
- October 2021: Updated for Ruby 3 and tf2onnx 1.9
- July 2022: Updated for tf2onnx 1.10